Difference between revisions of "Sonar"
(Created page with " This documentation is taken from Sonar2half.doc, in the Documentation folder in the GitHub repository. = Sonar Board = The board contains up to 8 sonars, numbered as in th...") |
|||
| Line 1: | Line 1: | ||
| − | + | [[File:SonarArray.JPG|1000px]] | |
This documentation is taken from Sonar2half.doc, in the Documentation folder in the GitHub repository. | This documentation is taken from Sonar2half.doc, in the Documentation folder in the GitHub repository. | ||
| Line 5: | Line 5: | ||
= Sonar Board = | = Sonar Board = | ||
| − | The board contains up to 8 sonars, numbered as in the diagram. The board acts as a slave to the host over an SPI line. | + | The board contains up to 8 sonars, numbered as in the diagram. The board acts as a slave to the host over an SPI line. The board has two RJ45 connectors, one to the High-Level board and the other to a second sonar unit. The line to High-Level carries the MOSI/MISO/CLK/SS lines for SPI. The connector to a second sonar unit has a UART serial connection to coordinate timing, but this has never been implemented. If there is a single unit, sonar 6 is rear-facing. |
| − | If there is a second rear-facing unit, the second unit acts as a slave to the forward-facing unit. In the two-unit configuration, sonar position 6 is unpopulated. Position 12R is never used. The two boards have identical hardware, but will use different software. | + | If there is a second rear-facing unit, the second unit acts as a slave to the forward-facing unit. In the two-unit configuration, sonar position 6 is unpopulated. Position 12R is never used. The two boards have identical hardware, but will use different software. A better configuration would be to connect both the forward and rear facing units to the High-Level board. |
Sonars are operated in three rounds, arranged so that there is no acoustic interference between them. | Sonars are operated in three rounds, arranged so that there is no acoustic interference between them. | ||
Revision as of 04:25, 28 June 2019
This documentation is taken from Sonar2half.doc, in the Documentation folder in the GitHub repository.
Sonar Board
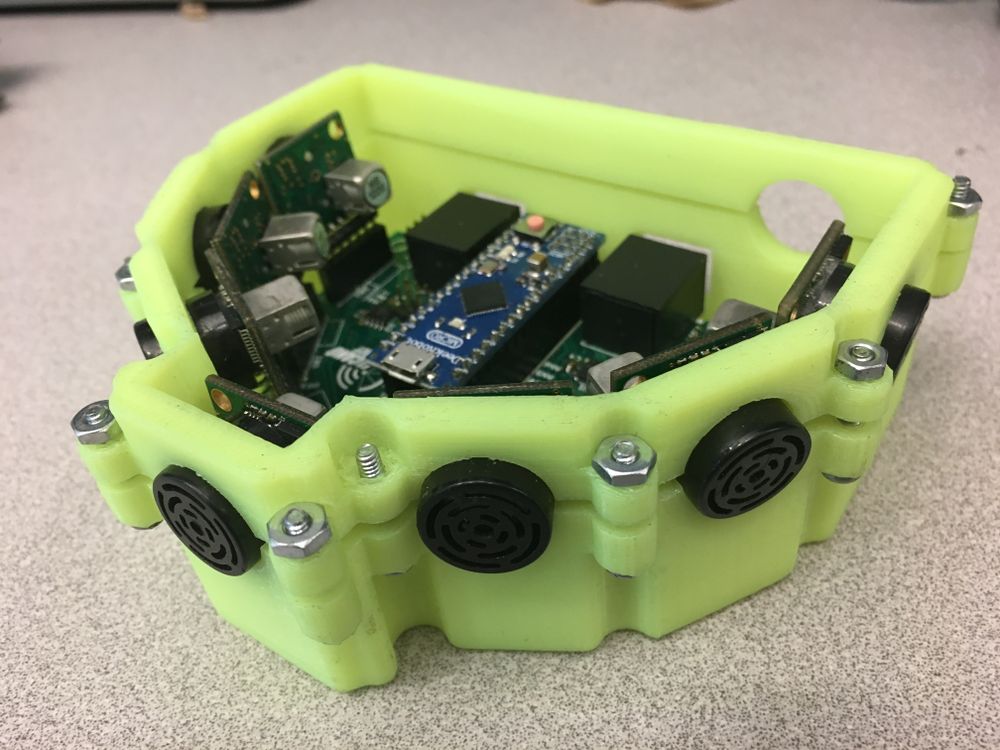
The board contains up to 8 sonars, numbered as in the diagram. The board acts as a slave to the host over an SPI line. The board has two RJ45 connectors, one to the High-Level board and the other to a second sonar unit. The line to High-Level carries the MOSI/MISO/CLK/SS lines for SPI. The connector to a second sonar unit has a UART serial connection to coordinate timing, but this has never been implemented. If there is a single unit, sonar 6 is rear-facing. If there is a second rear-facing unit, the second unit acts as a slave to the forward-facing unit. In the two-unit configuration, sonar position 6 is unpopulated. Position 12R is never used. The two boards have identical hardware, but will use different software. A better configuration would be to connect both the forward and rear facing units to the High-Level board.
Sonars are operated in three rounds, arranged so that there is no acoustic interference between them.
- Sonars at 12, 3, 4R, 7R, 9
- Sonars at 1, 3R, 6, 6R, 9R, 10
- Sonars at 2, 5R, 8R, 11
Board nomenclature is based on the forward position. When operated in the rear sonar positions are transformed as
12 → 6R
1 → 7R
2 → 8R
3 → 9R
6 → 12R
9 → 3R
10 → 4R
11 → 5R
Two or three pulse width signals on the board are wired together (by OR gates or diodes) and used to generate an interrupt when the pulse changes. The interrupt groups are:
IRQ1: 1, 2, 3 / 7R, 8R, 9R
IRQ2: 10, 11, 12 / 4R, 5R, 6R,
IRQ3: 6, 9 / 12R, 3R
During each sonar round, only one sonar will produce an interrupt.
Notes on 12/12/14:
The lines ADR_OK, ADR_0, ADR_1 and ADR_2 are not needed. They had been intended to select one of eight sonars. Instead, use lines RND_0 and RND_1, both attached to interrupts. These lines are sequenced according to a gray code (only one bit changes at a time):
(RND_0, RND_1) =
(0,1): Start a pulse on sonars at 12, 3 and 9 o'clock.
(1,1): Start a pulse on sonars at 1, 6 and 10 o'clock.
(1,0): Start a pulse on sonars at 2 and 11 o'clock.
(0,0): No action.
The resulting pulse is read on lines IRQ1, IRQ2 and IRQ3. On the forward pointing master, RND_0 and RND_1 are outputs. They are tied to the rear-facing slave, where they are inputs. On the slave, a change on any of lines RND_0 or RND_1 triggers an interrupt, which start the pulse on the appropriate sonars.
The hardware can read both pulse width range (IRQ_1 … 3) and analog range (SNR_1 … 12). It may be wise to use both, to make sure that they agree. No jumpers are needed. The analog values will change slowly, so interference with digital signals may not be significant.
On sonar:
Pin 1- Open or high
Pin 2 – To IRQ1, IRQ2 or IRQ3.
Pin 3 – To SNR_1, SNR_2, SNR_3, SNR_6, SNR_9, SNR_10, SNR_11 or SNR_12.
Pin 4 – Selected by RND_0 and RND_1.
Pin_5 – Serial data could go to D9, D10, D11 or D12, except that Arduino can only receive one software serial at a time. Probably not worth pursuing.
Pin 6 – Vcc
Pin 7 – Ground.
Timing
The default frequency for the SPI CLK is 4 MHz. The clock can be set to numbers between 8 MHz and 125 Khz.
-- Main.JohnsonB - 2017-06-27
- SonarBoard.png:
<img src="%PUBURLPATH%/%WEB%/%TOPIC%/SonarBoard.png" alt="SonarBoard.png" width="969" height="1254" />
